
In this tutorial, I want to share my experience with the PIR sensor in combination with the Raspberry Pi. First of all, here is a list of all items, which you need, to follow this tutorial.
- Raspberry Pi 2 Model B (v1.1) (Digitec)
- set up with Raspbian Desktop
- Speaker with 3.5mm Line-In
- 3.5mm Line-In cable (Male-Male)
- Jumper Cables (Female-Female) (Digitec)
- Adafruit PIR (passive infrared sensor) Sensor (Digitec | Amazon)
I have used an old Raspberry Pi 2 Model B for this experiment. But it also works with a newer model. You may have to change the GPIO numbers according to your board version. To check out type:
sudo pinoutAfter you have checked your board GPIOs, you are now ready to setup.
Wiring the motion sensor with Raspberry Pi
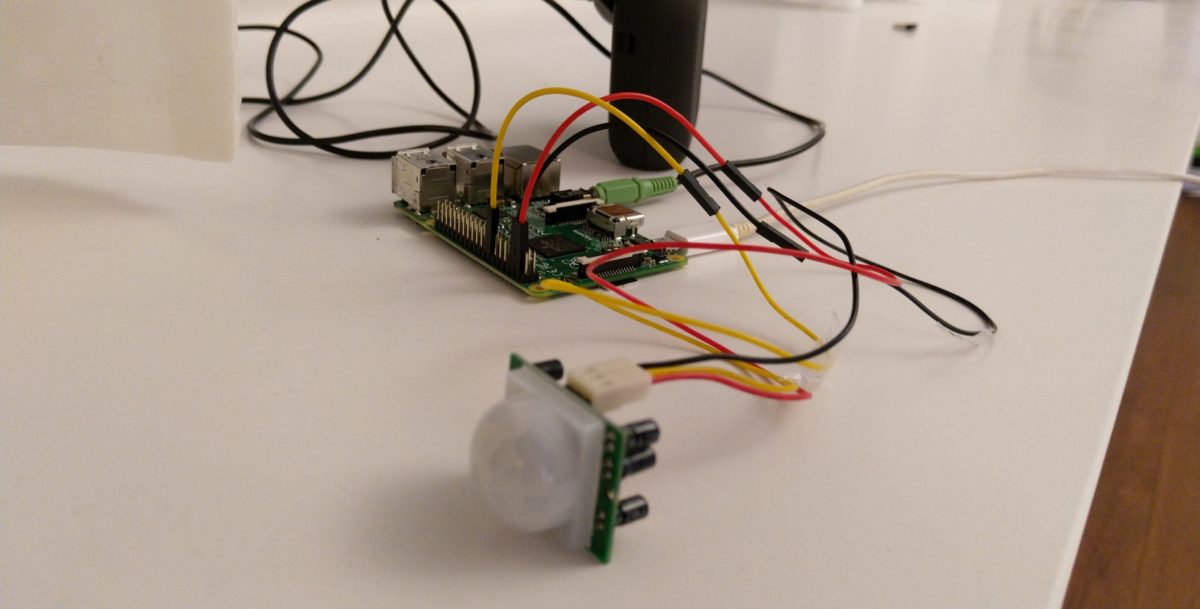
I have started connecting the motion sensor with the Raspberry Pi via the Jumper Cables. In that case, you don’t need an external board or to solder it. We have three cables to connect. The first is the 5V power pin (connected with a red cable). The second is the data pin on the GPIO 23. And last we have the Ground (GND) pin.

On my Raspberry Pi, this will look like this:

Connect the speaker with the Raspberry Pi
This is really simple, just plug in the audio cable on the Raspberry Pi and the other end to the speaker. This was an easy step, right?
Now we also have to force the output through this port. For that open a terminal in the Raspbian OS and enter
sudo raspi-configThere we will find the menu Advanced options > Audio and then Force 3.5mm ('headphone') jack
Code the Pi
Now we are coming to the programming part. Since we have connected the PIR to the GPIO 23, we are now able to get access to this pin through a python script. First, create a new file on your Pi Desktop called start.py and paste the following script:
| import RPi.GPIO as GPIO | |
| import time | |
| import os | |
| # Some GPIO standard settings | |
| GPIO.setwarnings(False); | |
| GPIO.setmode(GPIO.BCM); | |
| # Your GPIO number according to the GPIO number list of your Raspberry Pi | |
| PIN_NUMBER = 23; | |
| # Setup the GPIO instance with your number above and mark it as Input device | |
| GPIO.setup(PIN_NUMBER, GPIO.IN, pull_up_down = GPIO.PUD_DOWN); | |
| # Turn up the volume | |
| os.system("amixer set PCM -- 94%") | |
| inc = 0; # Delay counter | |
| # Run this code infinitely | |
| while True: | |
| time.sleep(1); # Sleep to relieve the PIR sensor | |
| inc = inc + 1; # Count up for the delay | |
| i = GPIO.input(PIN_NUMBER); # Get the response of your PIR | |
| print "Status ", inc,": ", i; | |
| # If last alarm was played at least 30 seconds ago and | |
| # sensor has detected a motion | |
| if inc > 30 and i == 1: | |
| print "Play"; | |
| os.system("aplay alarm.wav"); # Play the wav sound | |
| inc = 0; # Reset delay counter |
 by
by Audio file
Put also in the same directory your WAV file. Please make sure that you are using a WAV file because the command aplay only works with these files. Otherwise, you have to setup mpg321 to play MP3 files for example.
Start the script
Now you are able to start the script by typing the following command:
python start.pyEnd product
So now, your motion sensor with speaker output is ready. You can adjust the sensitivity and time output by turn the orange screws on the PIR sensor with a screwdriver.


Leave a Reply